What is Stone Veneer?
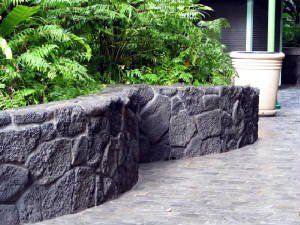
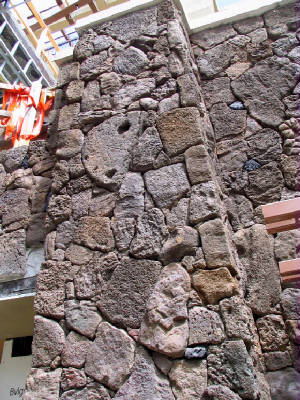
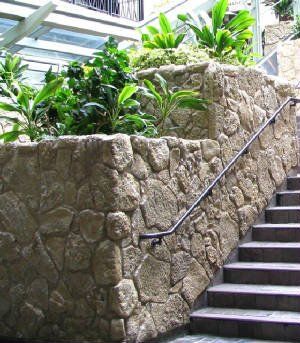
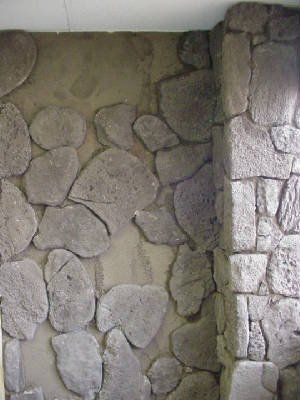
Stone veneer is a lightweight cast rock facing, virtually impossible to distinguish from natural stone. The cast veneer is a replica of the original Hawaiian natural stones and consists of the same basic materials. The stone veneer is cast in molds, using a formulation of Portland cement, lightweight volcanic aggregates, and mineral oxide pigments. At Big Rock Fabricators, we specialize in duplicating Hawaiian moss rock, lava from the Big Island, ocean coral, Maui Ulupalakua, blue rock, and cut basalt stone.
How we roll at Big Rock
At Big Rock Manufacturing Inc., we fill your order according to your needs. It is not necessary to order by the pallet, or by the box, as with other companies. Whether you need 2-square feet or a thousand, you buy only what you need and want! The lightweight quality of Big Rock Manufacturing Inc.'s stone veneer allows for quick and easy installation, which saves both time and money. Labor costs are less than they would be with real rock, as the installation time is reduced. Stone veneer does not require the expensive, heavy equipment needed to move and place. You can create a beautiful stepping stone walkway in a matter of hours, not days. Best of all, all of our products are made right here in Hawaii!
Easily applied to any wall surface
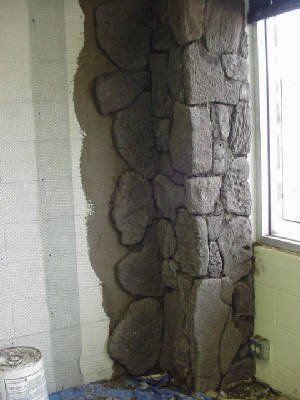
Rock walls lend a warm, earthy quality to any home or office, for a price that's out of this world. Not necessarily. Stone veneer from Big Rock Fabricators offers realistic looks, with easy installation, and affordability. Unpainted concrete surfaces such as tile, cast-in-place concrete, and cement board require no surface preparation. The stone is applied directly to the wall with mortar. Painted concrete and metal require the application of galvanized expanded metal lath before the scratch coat, and mortar. Interior wood, drywall, etc., need only metal lath, whereas exterior wood requires a waterproof vapor barrier, the metal lath, and then the mortar and the veneer. See below for detailed installation instructions.
Setting the stone
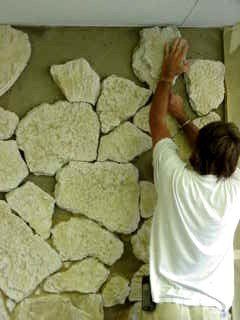
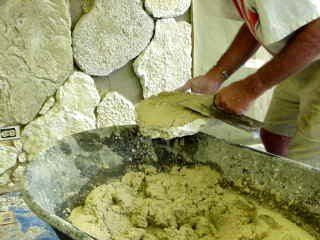
- Using a mason's trowel, apply about 3/4" thick even layer of mortar to the entire back of the stone.
- Then press stone firmly into place on the prepared wall, squeezing the mortar out around all edges.
- Using a gentle wiggling action while pressing the stone, will ensure a good bond.
- Right after setting each stone, use a mason’s trowel or a margin trowel to remove any excess mortar and to fill any voids.
- This serves not only to help seal the stone edges but also allows for tighter fitting of following stones.
- Just prior to setting each stone, apply a thin bead of mortar with a grout bag to the edges of all previously installed, adjacent stone.
- If any mortar accidentally gets on the stone face, do not try to wipe it off as it will smear and stain the stone.
- The mortar should be allowed to set until dry and crumbly, and then brushed off with a dry whisk broom.
Installation procedures
OVER SHEETROCK, WALLBOARD, PANELING, PLYWOOD OR OTHER RIGID WOOD-RELATED SHEATHING:
Cover the wall surface with a weather-resistive barrier. The barrier shall be equal to that provided for in the U.B.C. Standard No. 14-1 for Kraft waterproof building paper or asphalt-saturated rag felt. The building paper or felt shall be applied horizontally with the upper layer lapped over the lower layer not less than 2 inches. Where vertical joints occur, the felt or paper shall be lapped not less than 6 inches. Then install a 1.75 lb. diamond mesh galvanized expanded metal lath. Exterior applications will require a galvanized metal lath; however a non-galvanized black metal lath may be used for interior applications. Overlap lath sides by not less than 1/2" and lath ends by about 1". Attach the lath using galvanized nails or staples 6" on center vertically and 16" on center horizontally; penetrating studs a minimum of 1". Be sure to attach the metal lath with the small cups pointing upwards. Continuously wrap metal lath a minimum of 16” around all outside and inside corners. Then apply a 1/2" thick scratch coat of moor-tar over the metal lath and allow it to set.
OVER OPEN STUDS:
Apply paper-backed galvanized 3.4 lb., 3/8" rib expanded metal lath to the studs using galvanized nails or staples every 6" vertically on stud centers with a minimum L" penetration. Overlap lath sides by not less than 1/2" and lath ends by not less than 1 inch. For metal studs use corrosion-resistant self-tapping screws (Tapcon) with a 3/8" head that provides 3/8" minimum penetration beyond the inside metal face. Then apply a 1/2" thick scratch coat of mortar over the metal lath and allow it to set 48 hours.
OVER METAL PANELS:
Surface preparation is the same as for “over sheetrock, wallboard, paneling, plywood, or other rigid wood related sheathing" (see above) except the metal lath should be attached using self-tapping screws with a 3/8" head that provides 3/8" minimum penetration beyond the inside metal surface.
OVER CLEAN (UNPAINTED, UNSEALED, UN-TREATED) BRICK, BLOCK, CONCRETE OR OTHER MASONRY SURFACES:
No surface preparation is necessary, however you may, for added assurance and to minimize cracking or bond failure, use a metal lath and scratch coat. Newly poured concrete surfaces should be examined closely to ensure the surface does not contain form oil or other types of release agents. A method to determine their presence is by spraying surface with water. If water beads up or runs off the wall, the presence of a release agent is likely. If a release agent is present, acid etch, wire brush surface, or use a metal lath and scratch coat. It is imperative the concrete surface is free of form release contamination if lath and scratch coat is not used to ensure a proper bond. OVER PAINTED, SEALED OR TREATED - not sure why this cap text is here.
BRICK, BLOCK, CONCRETE OR OTHER MASONRY SURFACES:
The surface must either a) be cleaned back to the original surface by sandblasting, water blasting, acid etching or wire brushing or b) have metal lath attached using corrosion-resistant concrete nails with a scratch coat applied over the metal lath.
OVER RIGID INSULATION BOARD:
Surface preparation is the same as for “over sheetrock, wallboard, paneling, plywood or other rigid wood related sheathing” except the spacing for nails or staples should be 6" on center vertically and 16" on center horizontally, penetrating studs a minimum of 1".
PROPER USE:
Carefully follow these recommended installation instructions. Big Rock Stone Veneer should only be applied to structurally sound surfaces incorporating good building practices. It is important to divert water run-off away from stone surfaces by using cant strips, gutters and flashing. Run-off or splashing may stain the material. Water run-off combined with severe freeze-thaw conditions can result in surface damage. The use of a cap stone can be used to provide adequate run-off protection. Retaining walls must be water-proofed at the fill side and incorporate provisions for adequate drainage. Big Rock Stove Veneer should not be used below water level or in applications that subject the material to chlorine or chemicals that may discolor the stone.
LAYING OUT THE STONE:
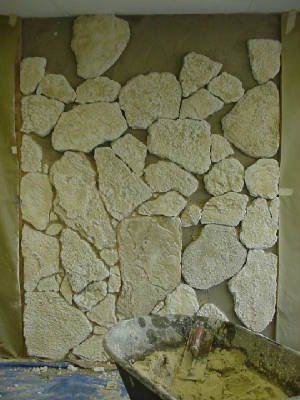
Before you begin, lay out a quantity of stone (25-square feet minimum) near the work area to give you a selection to choose from, When installing stone, try to achieve a balanced pat-tern of shapes, sizes, colors, thicknesses and textures by selecting and mixing the various stones. Select and mix stones of different sizes and shapes throughout the installation.
STARTING:
For standard installation procedure, Big Rock Stone Veneer is applied from the top down. This helps to keep the stone clean. For jointless/dry-stacked installation, stone is applied from the bottom up. Install the corners first for easiest fitting. Corner pieces have along and a short return. These should be alternated in opposite directions on the wall corner.
FITTING STONES:
Stones should be installed with uniform size grout joints. A consistent 1/2" or less space around the stones is desirable.
TRIMMING STONES:
For best fit, stones can be cut or shaped using a hatchet, wide mouth nippers or a mason’s trowel edge. Straight cuts can be made with a diamond or carbide saw blade. Cut edges must always be covered with mortar. Mortar should be mixed to a firm but workable (not too wet, not too dry) consistency.
WETTING THE STONE AND SUBSTRATE:
Under certain conditions the stone and substrate may need to be wetted. If the stone is being installed onto a very hot/dry surface or in a hot/dry climate, the stone and wall surface should be wet to prevent excessive absorption of moisture from the mortar. This can be done by spraying water onto wall surface and back of stone (you may also dip stone into a container of water). In either case the stone and the wall surface should be allowed to dry for a few minutes after wetting to eliminate excess surface water. For jointless/dry-stacked installations it will be necessary to wet the stones regardless of the weather conditions.
GROUTING THE JOINTS:
There are three distinct grout techniques, each with their own unique look: standard joint (raked), dry-stack joint and over grout joint (historically referred to as a sack finish). These three joint finishes play a major role when it comes to finishing a job that has the look and feel of real stone.
- A standard joint (raked) is achieved by laying each stone roughly one finger width apart from each other, and then a grout bag is used to fill the joints with mortar, forcing grout into any voids. Be careful not to smear grout onto the face of the stone. Any mortar that accidentally gets on the stone should be allowed to set until dry and crumbly, and then brushed off with a dry whisk broom.
- Dry-stack joint stonework is accomplished by “dry” fitting each stone prior to installation. Each piece can be laid with virtually no joint. Even though you’ve used mortar to set the stone to the surface, when complete, the finished look will appear as though no mortar was used to install stone. However, it is sometimes desirable to do touch-up grouting to fill noticeable voids and to conceal cut or broken stone edges.
- Over-grout, an increasingly popular way to achieve an old-world look, is a technique that tends to make the stonework appear rustic and aged. The grout overlaps the face of the stone, widening the joints and making them very irregular. It’s important that the joint’s mortar be applied without air pockets and are filled completely to the substrate. Overfill joints when applying grout. Mortar should be right between being too wet and too crumbly. The over grout technique uses almost every stone shipped because broken edges can be hidden by grout.
FINISHING THE JOINTS:
When the mortar joints become firm (normally 30-60 minutes), use a wooden or metal striking tool to rake out the excess mortar to the desired depth while at the same time forcing the mortar into the joints so as to thoroughly seal the stone edges. Be careful not to work the joints too soon or the mortar will smear. After working the joints, use a whisk broom to smooth the joints and clean away any loose mortar from the joints and stone face. Loose mortar and mortar spots which have set for only a few hours clean up easily and should never bellowed to set up overnight.
CAUTION:
Do not use wet brushes or sponges to wipe the joints or clean mortar off the face of the stone as it will smear and stain. Also, never use wire brushes or acid on the stone surface.

